Applying Transfers/Decals

Most decal/transfer film is very thin to enable it to conform to shapes more readily. If you soak it too long, the water tension under the decal film will cause the edges to curl under. The key to avoiding this is to soak the decal only long enough to have it release from the backing paper and to SLIDE it off the backing paper onto the model. Just follow the instructions below.

1. Transfers are best applied to a glossy surface. Apply glossy paint or spray a clear gloss coating on your model before applying transfers.

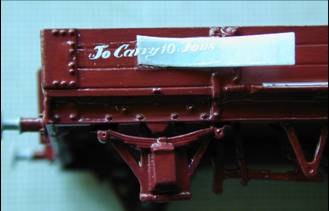
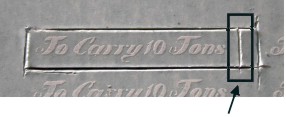
2. Carefully cut the transfer from the sheet. Cut slightly longer as shown in the photo and then to make it easier to slide the decal off the backing paper cut through the surface of the decal only as indicated by the box and arrow on the photo.

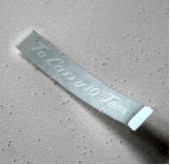
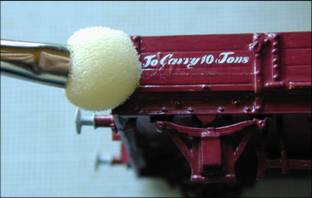
3. Using tweezers, dip the transfer into plain water. Remember to use a little water to wet the area on your model that will be covered by the transfer. Soak the decal in water until the transfer is just about to slide off the backing paper (usually about 30-40 seconds although it can vary). Another way of assessing when the transfer is ready is to wait until it just starts to uncurl (the backing causes the decals to curl when placed in water. As it absorbs water, the backing paper uncurls). Very gently test to see if the decal will slide on the backing paper. If not, then soak a little longer. You want the decal to just begin to slide on the backing paper. This will give the decal the maximum amount of glue on its back. An alternative is to use a sponge in a saucer of water but do not allow the water to overlap the top of the sponge. Lay the decal on the wet sponge instead of directly in the water.

4. You must then SLIDE the decal off the backing paper onto the model. Wet the area where the decal will be going and then, holding the edge of the decal, slide the backing paper out from under the decal, letting the decal lay down on the model.

5. You probably will have wrinkles but they can be smoothed out using a small sponge or a small paint brush. Once the decal is how you want it, gently blot the excess water and allow to dry completely.

6. If the transfer is being applied over an area of the model that is not smooth (eg: over bolt heads, a framing bar) then you should apply a decal softener such as Mr Mark Softer. This is available from in from us. We have found this to be extremely effective for laying transfers over surface relief features. It softens and moulds the decal to the surface and hides the outline of the transfer to some extent. All you need to do when you have the transfer on the model in the correct position is to apply a few drops of Mr Mark Softer, wait about a minute or so, then carefully using a small straight ended paintbrush or small sponge apply pressure to the transfer to make it conform to the underlying surface. A small sponge on the end of paint brush handle can be purchased from Micro-Mark (Item No. 60764).

7. After allowing the transfer to dry completely, finish and protect the decal by spraying with a matt varnish (eg: Testors Dull Cote or Topcoat (flat or gloss) from Hobby Colour to seal the transfer so that it does not rub off or break away. The outline of decal will also be hidden. We have found that Testors Dull Cote produces the finest finish while Topcoat (flat) is a little coarser. You can then proceed to "weather" the model with AIM or Tamiya weathering products if desired.