

Soldering Made Easy: Part 2.
Introduction
In Part 1 I covered the components required for good soldering as well as the basic techniques. I had intended to include some photos with the last article but those I had were not satisfactory for printing. As I feel that a series of photos illustrating the techniques and equipment discussed would be of value to readers I have retaken them with much more success. Thus I will summarise what was covered in the last article using the photos to illustrate the points made. As well I will describe in detail the metal plate and associated accessories I have designed and built to aid the soldering process.
EQUIPMENT
As I mentioned in Part 1 the soldering iron I use is a Digital Temperature Controlled Soldering Station. It has a number of admirable features including a separate soldering iron stand which includes a sponge for wiping the soldering iron tip, a large digital easy to read and set temperature display as well as three user settable temperatures (see Fig 1).
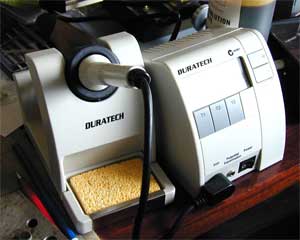
Figure 1: A Digital Soldering Iron
The other major item of equipment that I use all the time was mentioned in the last article but not described in detail. It is the metal plate shown in Fig 2. below with the various magnets, metal bars (with inserted button magnets) and metal blocks. This is used in a variety of ways (only limited by one's imagination and ingenuity) to hold the work to be soldered either using the conventional soldering iron or for resistance soldering (more later). As I mentioned last time it is important to clamp the pieces to be joined, if at all possible, otherwise misalignment or distortion can occur. The piece of white card resting on the metal plate is used to insulate the brass pieces to be joined and stop the flow of heat from the brass to the metal plate. This is particularly important if you are using a conventional soldering iron. I also use small pieces of yellow Post-It notes for the same purpose although they do not inhibit the heat drain as much. For resistance soldering Post-It notes are particularly useful to electrically insulate pieces being joined.
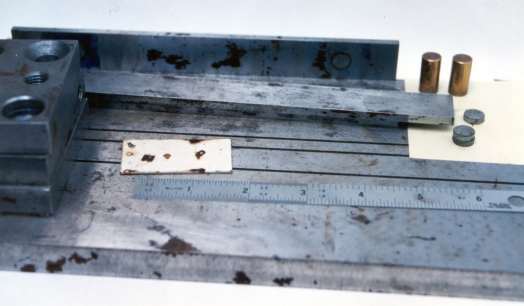
Figure 2: Metal plate, bars, magnets used for facilitating soldering.
For those interested in making their own metal plate it measures 12 inches by 6 inches (305 mm by 152 mm for those who prefer metric) and is 5/8 inch (16 mm) thick. It is quite heavy! You could use a thinner plate but it must be heavy enough to remain stationary while you are clamping or soldering. The plate has been surface ground flat to within 0.1 mm (this was done a the local TAFE metal-working facility at which my wife and I were doing a course). It is important that it is flat otherwise you will never be able to use it satisfactorily to clamp and align pieces to be joined.
You can purchase metal plates of approximately these dimensions already surface ground but only in lengths of 6 feet of more!
The metal bars are also surface ground and are 0.85 inch (22 mm) wide by 8 inches (203 mm) long and 0.17 inches (4.5 mm) thick. Each one has two rare earth button magnets inserted into each end to enable it to stick strongly to the metal plate or other metal bars, blocks, etc. These are more than sufficient to hold the bar strongly to the metal plate with the metal piece (non ferrous!) to be soldered and any insulation in between. These button magnets can be seen in the middle right hand side of Fig 2. just below the two brass cylinders. They are extremely powerful and some care must be taken when handling them. If any skin of your fingers is caught between the magnet and the metal plate it can be quite painful!
The brass cylinders contain small rare earth magnets in their base and are somewhat easier to handle than the button ones. They are available from Exactoscale but are rather expensive. You could make your own by embedding a small magnet in piece of brass rod using Araldite taking care to make sure the magnet remains at the bottom of the cylinder! The button magnets are part of a range of magnets of all shapes and sizes available by courier (you can't mail them) from a number of suppliers (see below) and are not very expensive. These magnets are extremely useful, if not essential, to enable you to clamp your work exactly as desired for soldering. Other systems using clamps and slots do not have enough flexibility to do the job properly and can be extremely frustrating.
On the left of Fig 2. can be seen a stack of three metal blocks with holes in the top. These were not, I must admit, purpose built but were "throw aways" from an exercise we were asked to at the TAFE. They have proved to be quite useful. Their dimensions are 3 inches by 3 inches by 0.6 inches thick.
Material Suppliers
As well as directly from Brunel Hobbies you can also purchase solder and flux from a number of Brunel Models retailers